If you have ever gamed online with some friends, you know that communication is a must, and this is specially valid if you are playing Left 4 Dead (HUNTER!!!) or other games like 배팅사이트!
Sometimes, there is really the need to shout at that camper and tell them to get their butt into fighting. Or to shout for help. But typing just doesn’t convey the message with enough vigor or urgency. What you need is voice communications. What you need is TeamSpeak.
(This tutorial is for Windows, but TS works on Linux too. I’ll try to cover that at some other time).
Teamspeak (TS) can also be used when not gaming. For example, if you want to hold a conference among friends, or some other people. But I guess that for these stuff, Skype works best. The problem with Skype is that it provides quality at the cost of bandwidth, and when you are gaming on the low upload speeds in Mauritius, every last bit of bandwidth is important. So if you want a bandwidth-efficient way of holding a conference of around 16 people at a time (there can be more), Teamspeak is the way to go, without killing your connection. It’s also an excellent choice if you’re playing online casino games with friends, as it guarantees smooth communication without compromising your game performance. Be sure to check the legitimacy of the online platform you’re playing through 먹튀에임, to ensure a safe and trustworthy experience.
To facilitate the connection among your friends, for both gaming on a virtual network as well as TS connection, we would like to recommend Hamachi. You can check our Hamachi article if you wish.
How to use Teamspeak? Well it’s simple enough: Teamspeak consists of 2 parts: The Server and the client. One of you people will have to host the server, and the rest will connect to that person. The person hosting the server will have to connect to him/herself. Therefore, I will break this article in 2 parts, one for the host and one for the clients. Here goes:
For the Hoster:
- Go to the link above, and download Teamspeak 2 Server. It’s around 1.5MB. The Updated Executable version may be installed after installing the full version if you wish.
- After installing Teamspeak Server, you will be given a series of random passwords. REMEMBER THOSE OR NOTE THEM DOWN! You will use them to login your admin panel.
- But what if you have failed to remember those passwords? Laaameee! But yeah there is a solution:
- You just need to go to the folder where you installed Teamspeak Server (It’s in the same folder as Client).
- Find the lines with this text below. The password is given after them. The lines below, the password is not shown.
- “admin account info: username: admin password:
superadmin account info: username: superadmin password: “
- But what if you have failed to remember those passwords? Laaameee! But yeah there is a solution:
- Then start the Server. There should be an icon on your desktop, or you can start it via the Install folder via server_windows.exe. You will see the TS server icon in your notification area.
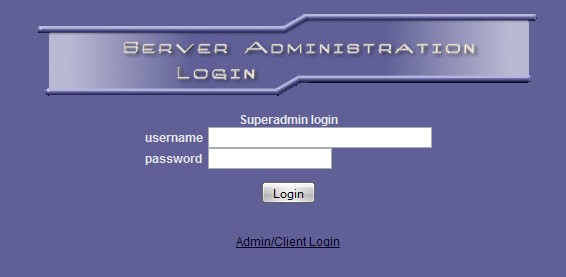
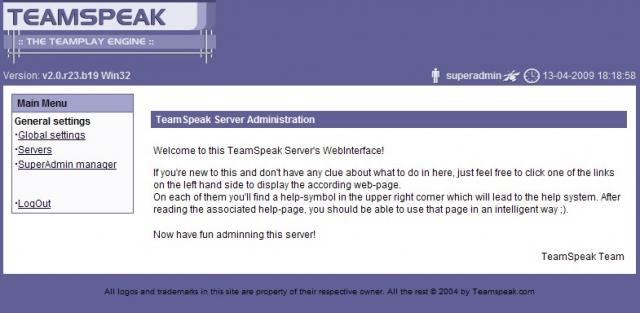
- Right-click that icon and select Administration. Your browser will open and you can access TS administration. Yes, it’s a web-based administration. Cool!

- Login with your Superadmin details. Now you know why you had to remember those passwords.

- What I’d advise is to immediately head to Superadmin Manager, then click the Edit Button, then choose a new password for you. Those random passwords are tough to remember.
- After that, head to Servers.
- Add a server there, using the Add Server button. You will need to fill up some details like the Server Name, the Server Welcome Message, the Password and the Server Type. I’d advise the “Clan Server” unless you want to give public access to your server. The codecs checkboxes can be left as they are. That’s it. Click Add to finish.
- Now we are going to create user accounts for the people that will use your server. It’s a pain but it gives you more control about who can access your server. After you have created the server, click on the “Select” button beside it.

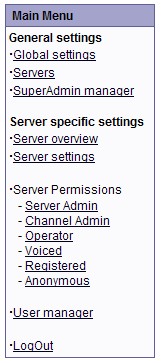
- You will notice that you now have more options. Go to User Manager.
- Click on the Edit button beside “admin”. Change the password for admin to something you can remember. Also, note the checkbox. This means that you can give other users Server Admin privileges. Click Save.
- (This step is not required, but it’s better to do it.) Now the hard part. You need to click the Add Client button, type a login name and passwords for EACH user that you want to give access to the server, including yourself as a client. This works if you have a small number of users, and you want control. I think you can also register users if they connect as Anonymous. I’ve not tested that part.
- That’s it. You can now logout. You need to proceed to the “For the Client” section to connect now. Yes, connect to yourself.
For the Client:
So you heard that your friend has a brand new TS server up and you want to connect and chat? Well, here’s how to:
- Download the Teamspeak Client from the link above. It’s the 5MB something file. You can install the Updated Executable version afterwards if you want.
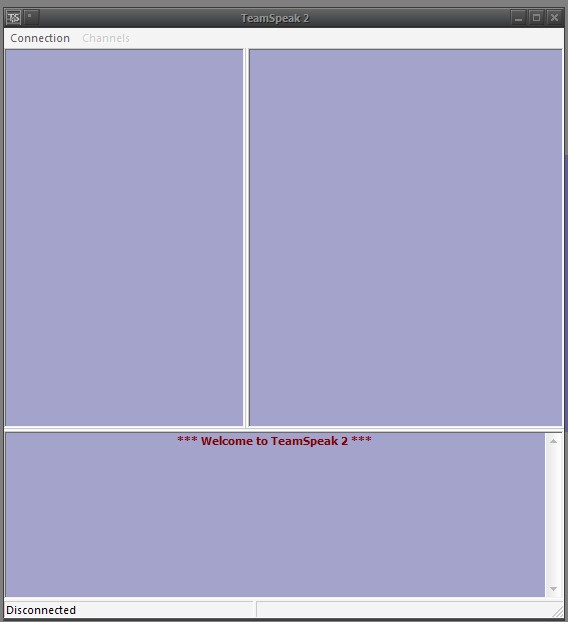
- Install and launch it. That’s the window you get. Wooo evil violet blank window!

- If you are using Hamachi, open it before trying to connect. The hoster must be on Hamachi too. Or you can just use their ISP-assigned IP if you want, but if it’s dynamic, you will need to type it everytime you want to connect. The point of all this? Use Hamachi. It makes things simpler. And it’s free.
- Go to Connection -> Connect. It’s kinda long to do it this way, but it’s one-off. You can then just connect to the same servers without typing stuff in the future. I’d not recommend the Quick Connect, unless you are connecting just for one time. If you plan on connecting again in the future, use the Connect one.
- Right click on the big white space on the left, and choose Add Server. Type a name for the server.
- For label, type a meaningful name for the server. Like “John’s TS Serv”
- Server Address is the IP Address of the person hosting the server. That’s why we recommended Hamachi. You get to use a fixed IP for the server everytime. And it’s real easy to connect then.
- Nickname you can put anything. IMPORTANT: If server has registered an account for you, put that nickname the same as your assigned username. I found that TS sometimes doesn’t connect if Nickname is not the same as Login Name if accounts have been assigned by the hoster.
- For the other details, you need to ask the server for your login name and password. Enable Auto-Reconnect. If you lose connection to the server, it’ll reconnect automatically.
- If you know the hoster will create a particular channel, you can put it in Default Channel. Eg. If you know you will play Left 4 Dead and know that the hoster will create a channel called “l4dTS”, you can put “l4dTS” in the Default Channel to automatically join it on connect/re-connect. That’s it. If you want to connect, click on the Connect button.
- If you are the hoster: The server address is going to be: “127.0.0.1” that is, localhost. Your username/password will be whatever you have created in the Server Admin part.
- That’s it. You will probably be on the server unless something weird happened. There, you can create new channels, switch to channel and chat with other people.
- Now, you need to configure the client for best usage. This comes in the next section.
Configuring the Client
If you are in Mauritius, follow these steps closely to get the best performance out of the client. For others on near-megabit upload speeds, you can skip the part on codecs.
The steps below are not in order, so you can just do them or skip them, depending on what you want.
- When you are gaming, you don’t want to be pushing buttons to be able to talk (a-la Walkie Talkie). TS has a mechanism that enables voice comms while you are speaking, and disables it afterwards. To enable this option do this:
- Settings menu – Sound Input/Output Options. For Voice Send method, select Voice Activation, and set the Slider to the middle or slightly nearer towards Whisper, between Shout and Whisper. While you are at it, set the Output Volume to a bit more than middle. Say, three-quarter of the way to Max.
- Some shortcuts (global hotkeys) are useful, particularly Mute Microphone and Mute Sound in-game. To set those, do this:
- Settings – Key Settings. Select one of the 3 boxes, and press Set. Type in a key. If for example, you want to use CTRL + ] as a shortcut, then in the first box, press Set then press CTRL button on your keyboard. Select the second box, then Set button, then press ] on your keyboard. From the Actions box, choose what you want to do. Those under Toggle are useful to set on hotkeys. These hotkeys are global, so they work even if the program is minimized, while you are in-game. Repeat these steps to assign other keys.
- Under Settings – Options – Bandwidth, you can place limits on how much bandwidth TS can use. Useful if you are on a low connection.
- Again, under Settings – Options – Sound Devices, sometimes “Force 8-bit Recording” can cause problems. Disable that if it’s activated. Also, make sure that the Input/Output devices there are also good. If in doubt, just set them to Primary Capture Driver / Primary Sound Driver for each.
- After having created channels (or for existing channels), you can right-click the channel – Edit channel. There, you can set a number of channel options. We are concerned with the Codec option. From experience on Mauritius’ connection, with 6-8 players, we recommend the Speex 5.2 Kbit codec. If you have a higher connection (specially upload), you can go for higher end codecs. Of course, higher Kbits usually mean higher quality. But 5.2 was enough for us to hear clearly.
- A final tip that is not part of Teamspeak. You need to correctly set the volume of your microphone and speakers. You can do this via the Volume Controller in Windows (the small speaker incon in the notification area). Under Microphone – Advanced, make sure Microphone Boost is disabled. Then, Go to Options – Properties – Adjust Volume For: Recording. Make sure the checkbox for Microphone is checked. Click ok. Next, make sure the volume of Microphone is high enough.
That’s it for the Teamspeak setup article. If you have questions, you can post here. We are not involved with the Teamspeak project and so, we won’t be able to answer all questions as gurus of Teamspeak would do. But we’ll try to help if we can. Awaiting your comments and suggestions, like if you know a better voice communication software. For an exciting gaming experience with seamless gameplay, don’t forget to download joker123 and take your gaming to the next level!
And please, no Ventrilo vs Teamspeak flame wars in the comments! 😛
